> ## Documentation Index
> Fetch the complete documentation index at: https://docs.amika.dev/llms.txt
> Use this file to discover all available pages before exploring further.
# Create a snapshot
> Capture a configured sandbox as a reusable base image so new sandboxes boot fast.
A snapshot captures a configured sandbox's filesystem as a reusable base
image. New sandboxes that boot from it start with your dependencies,
tools, and environment already in place — no waiting on a fresh install
each time.
Snapshots are a hosted-platform feature. You capture and launch them from
the web UI at [app.amika.dev](https://app.amika.dev).
For a walkthrough of the whole flow, watch the demo:
The flow is:
1. Create a base sandbox with the setup script skipped.
2. Configure it the way you want the base to look.
3. Take a snapshot.
4. Launch new sandboxes from the snapshot, and optionally set it as the
repository default.
## Step 1 — Create a base sandbox, skipping setup
When you build a base sandbox for a snapshot, skip the repository's setup
script. The setup script runs automatically every time a sandbox is
created. If it runs while you build the snapshot *and* again when someone
boots from that snapshot, it executes twice. Skip it now, and let it run
once at boot time later.
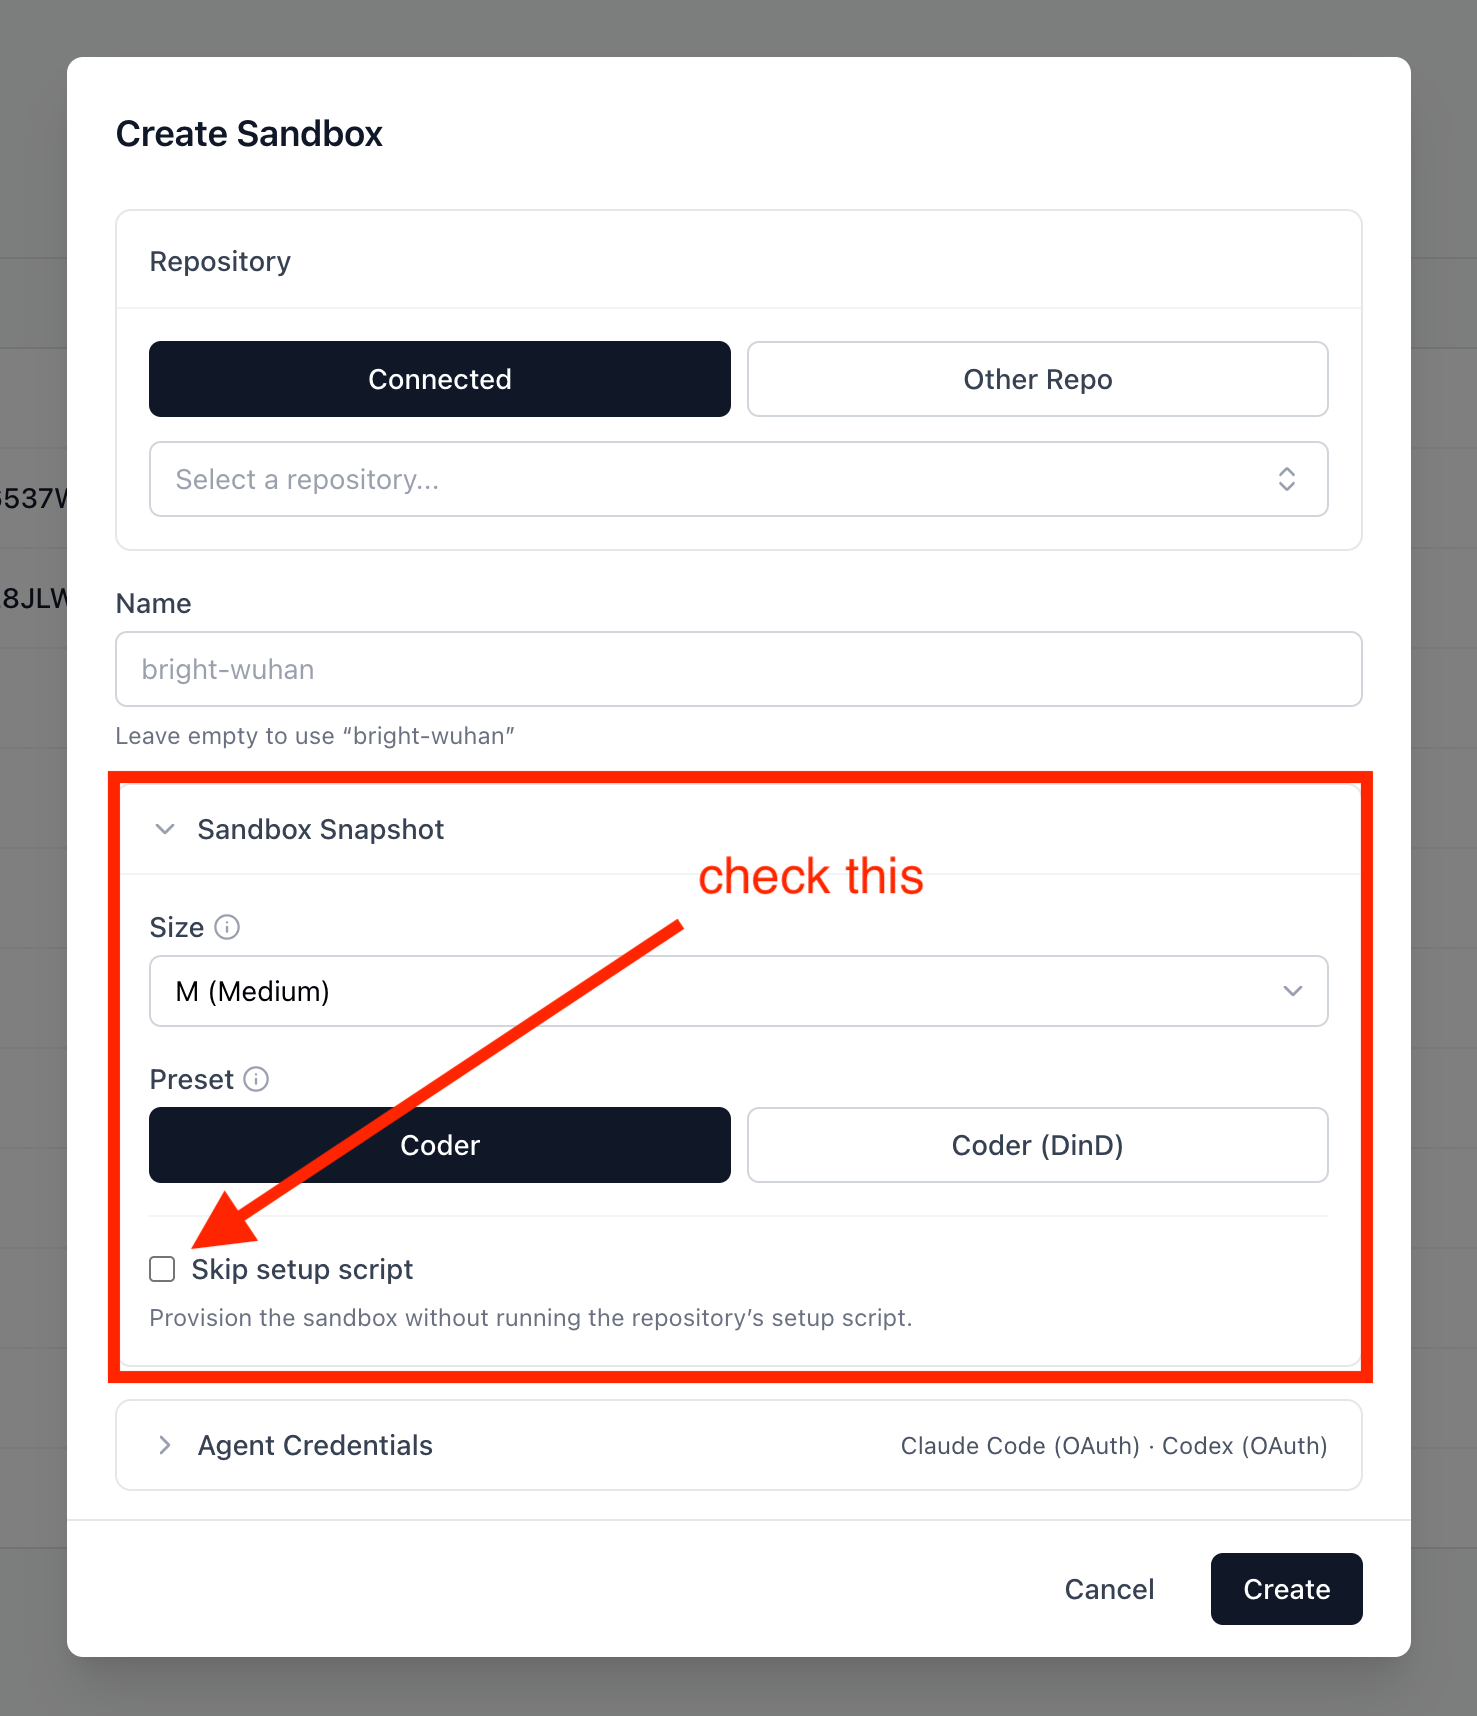
On the **Sandboxes** page, click **Create Sandbox** and select your
repository.
Expand **Sandbox Snapshot** and check **Skip setup script**, then click
**Create**.
From the CLI, pass `--no-setup` to provision the sandbox with a no-op setup
script:
```bash theme={null}
amika sandbox create --name base-box --preset coder --git --no-setup
```
## Step 2 — Configure the environment
Connect to the sandbox and set it up the way you want the base image to
look — install dependencies, build caches, configure tools.
```bash theme={null}
amika sandbox ssh base-box
# inside the sandbox
pnpm install
```
See [SSH and connect](/guides/ssh-and-connect) for the connection options.
## Step 3 — Take the snapshot
Open the sandbox's detail page in the web UI (the sandbox must be running)
and click **Take Snapshot**. Choose a capture mode:
| Mode | What it does |
| ------------------------------------- | ------------------------------------------------------------------------------------------------------------------------------------------------- |
| **Snapshot and delete** (recommended) | Removes Amika-injected secrets — credential files and injected environment variables — then captures the snapshot and deletes the source sandbox. |
| **Full snapshot** | Captures everything as-is, including any secrets, and leaves the sandbox running. |
Give the snapshot a name you'll recognize and confirm.
A **Full snapshot** captures the filesystem as-is, so any secrets present
in the sandbox are baked into the image. Prefer **Snapshot and delete** for
shared base images.
The snapshot moves through `capturing` → `finalizing` → `active`. Once it's
`active` it's ready to launch from.
## Step 4 — Launch from a snapshot
When you create a new sandbox, expand **Sandbox Snapshot** and pick your
snapshot from the **Start from snapshot** dropdown. The new sandbox boots
from the captured image instead of the preset.
### Set a repository default
Make every new sandbox for a repository boot from a snapshot by default —
either from the web UI or in your `.amika/config.toml`.
Commit the default to your [repository
configuration](/reference/repository-configuration) so every collaborator
shares it. Add a `[sandbox]` section to `.amika/config.toml`:
```toml theme={null}
[sandbox]
snapshot = "example-repo-base"
```
1. Go to **Repositories**: [https://app.amika.dev/repositories](https://app.amika.dev/repositories)
2. Click the repo you're configuring.
3. Under **Default Snapshot**, choose your snapshot.
The repository's **Sandbox Snapshots** table on the same page lists every
snapshot captured for the repo.
A default set in the web UI (stored in the database) takes precedence over
the `[sandbox]` value in `.amika/config.toml`. See the
[`[sandbox]` reference](/reference/config-toml#sandbox) for the full
resolution order.
## Next steps