Snapshots are a hosted-platform feature. You capture and launch them from
the web UI at app.amika.dev.
The flow is:
- Create a base sandbox with the setup script skipped.
- Configure it the way you want the base to look.
- Take a snapshot.
- Launch new sandboxes from the snapshot, and optionally set it as the repository default.
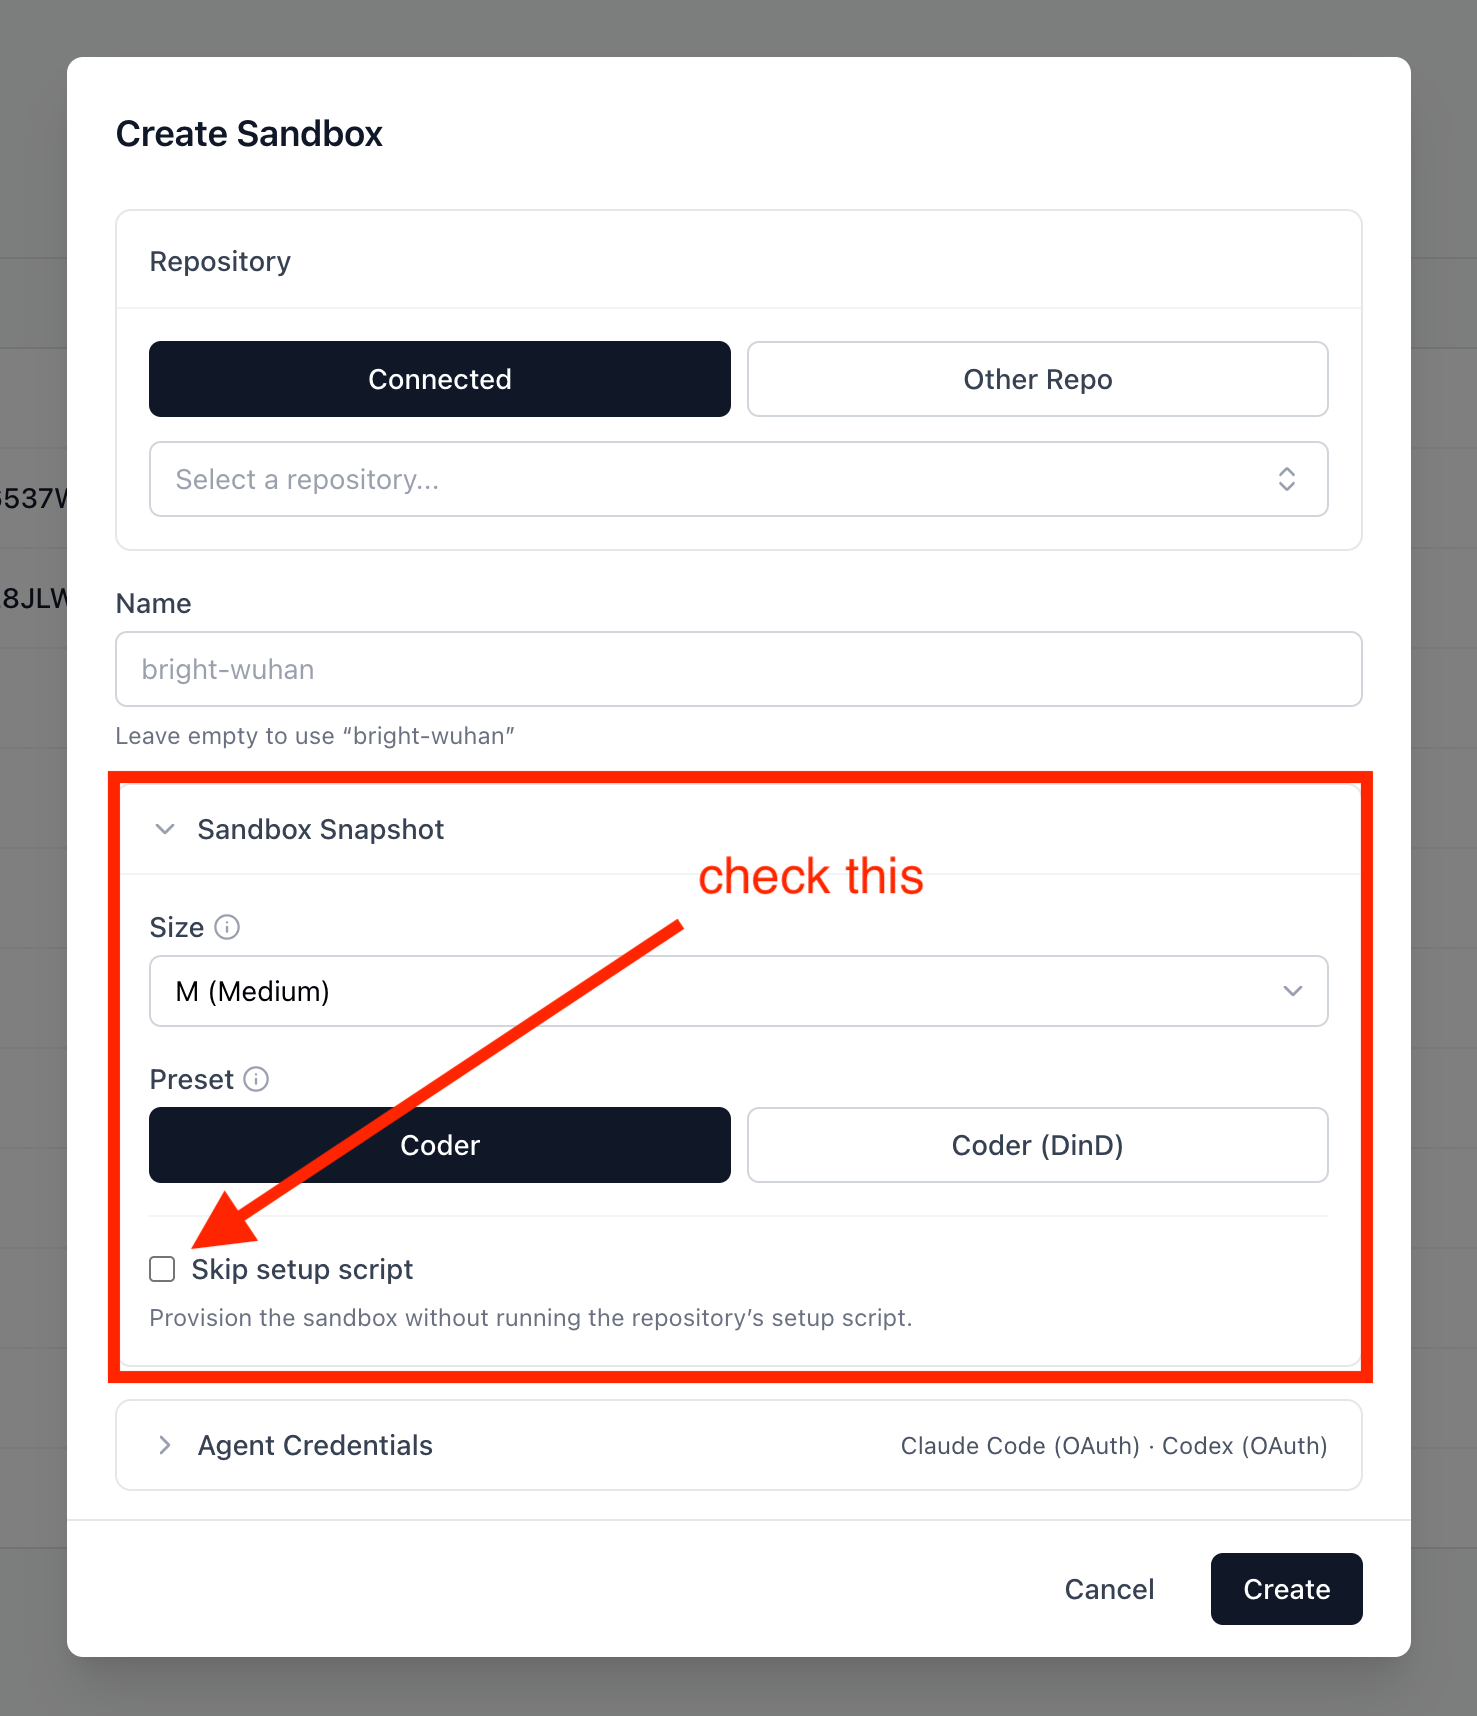
Step 1 — Create a base sandbox, skipping setup
When you build a base sandbox for a snapshot, skip the repository’s setup script. The setup script runs automatically every time a sandbox is created. If it runs while you build the snapshot and again when someone boots from that snapshot, it executes twice. Skip it now, and let it run once at boot time later.Open the Create Sandbox dialog
On the Sandboxes page, click Create Sandbox and select your
repository.
--no-setup to provision the sandbox with a no-op setup
script:
Step 2 — Configure the environment
Connect to the sandbox and set it up the way you want the base image to look — install dependencies, build caches, configure tools.Step 3 — Take the snapshot
Open the sandbox’s detail page in the web UI (the sandbox must be running) and click Take Snapshot. Choose a capture mode:| Mode | What it does |
|---|---|
| Snapshot and delete (recommended) | Removes Amika-injected secrets — credential files and injected environment variables — then captures the snapshot and deletes the source sandbox. |
| Full snapshot | Captures everything as-is, including any secrets, and leaves the sandbox running. |
capturing → finalizing → active. Once it’s
active it’s ready to launch from.
Step 4 — Launch from a snapshot
When you create a new sandbox, expand Sandbox Snapshot and pick your snapshot from the Start from snapshot dropdown. The new sandbox boots from the captured image instead of the preset.Set a repository default
Make every new sandbox for a repository boot from a snapshot by default — either from the web UI or in your.amika/config.toml.
- .amika/config.toml
- Web UI
Commit the default to your repository
configuration so every collaborator
shares it. Add a
[sandbox] section to .amika/config.toml:A default set in the web UI (stored in the database) takes precedence over
the
[sandbox] value in .amika/config.toml. See the
[sandbox] reference for the full
resolution order.